- Ticket Management Overview
- How to view the tickets list and search for tickets
- How to change the status of a ticket
- How to view detail of a ticket
- How to reply to a ticket
- How to forward a ticket
- How to delete a ticket
- How to reassign a ticket
- How to mark a ticket as resolved or reopen it
- How to merge tickets
- How to lock a ticket
How to merge tickets
STEP-BY-STEP
-
1Log in as an administrator and go to the Admin Dashboard.
Learn how to log in here → -
2Go to CRM Portal>> Ticket Listing
-
3Click on the Merge to existing ticket icon to the left of a ticket
-
4The condition for merging:
- The source and the target tickets must have the same type (or the source ticket has NO type - in this case, it can be merged into a ticket with any type)
- Both tickets are NOT assignments.
- Both must belong to the same Contact
- And certainly, they have different IDs

-
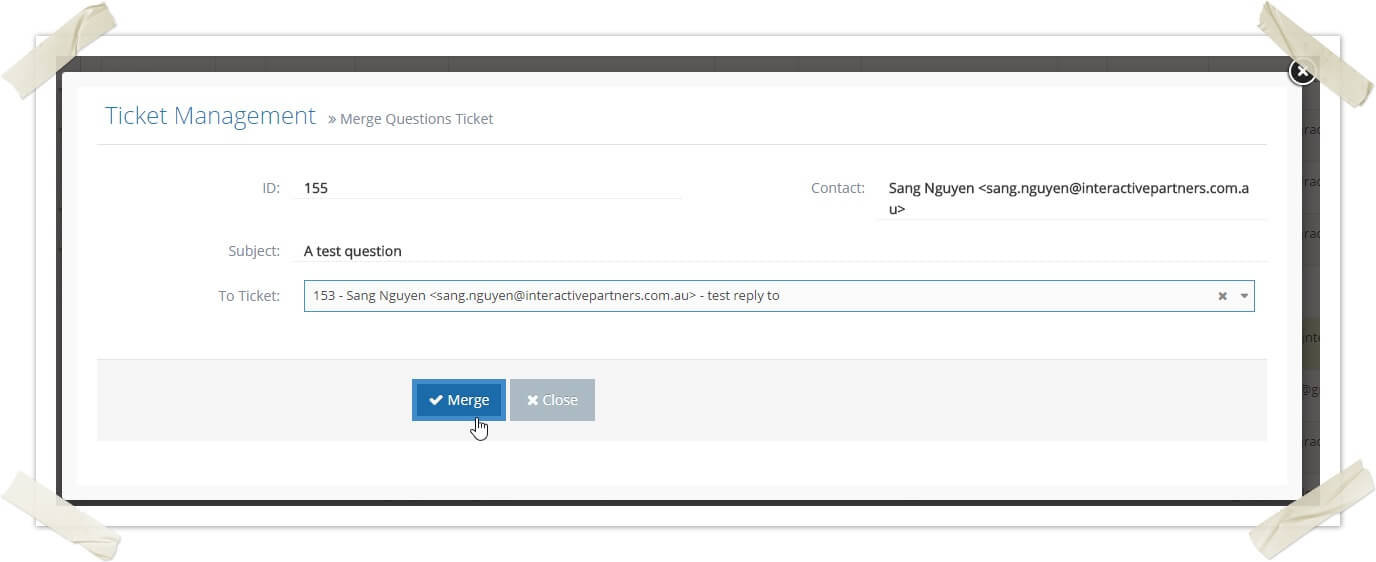
5The merge ticket popup will be displayed

-
6Enter something about the ID, ticket subject or contact email of a ticket to filter the tickets and pick a target ticket
-
7Click on the Merge button to merge the source ticket with the target ticket
-
8After merging the target ticket will contain all logs of both tickets and the source ticket is deleted