Front-End: How to apply the Curly Bracket
STEP-BY-STEP
-
1Log in as an administrator and go to the Admin Dashboard.
Learn how to log in here → -
2
Click the Edit page icon to start.

-
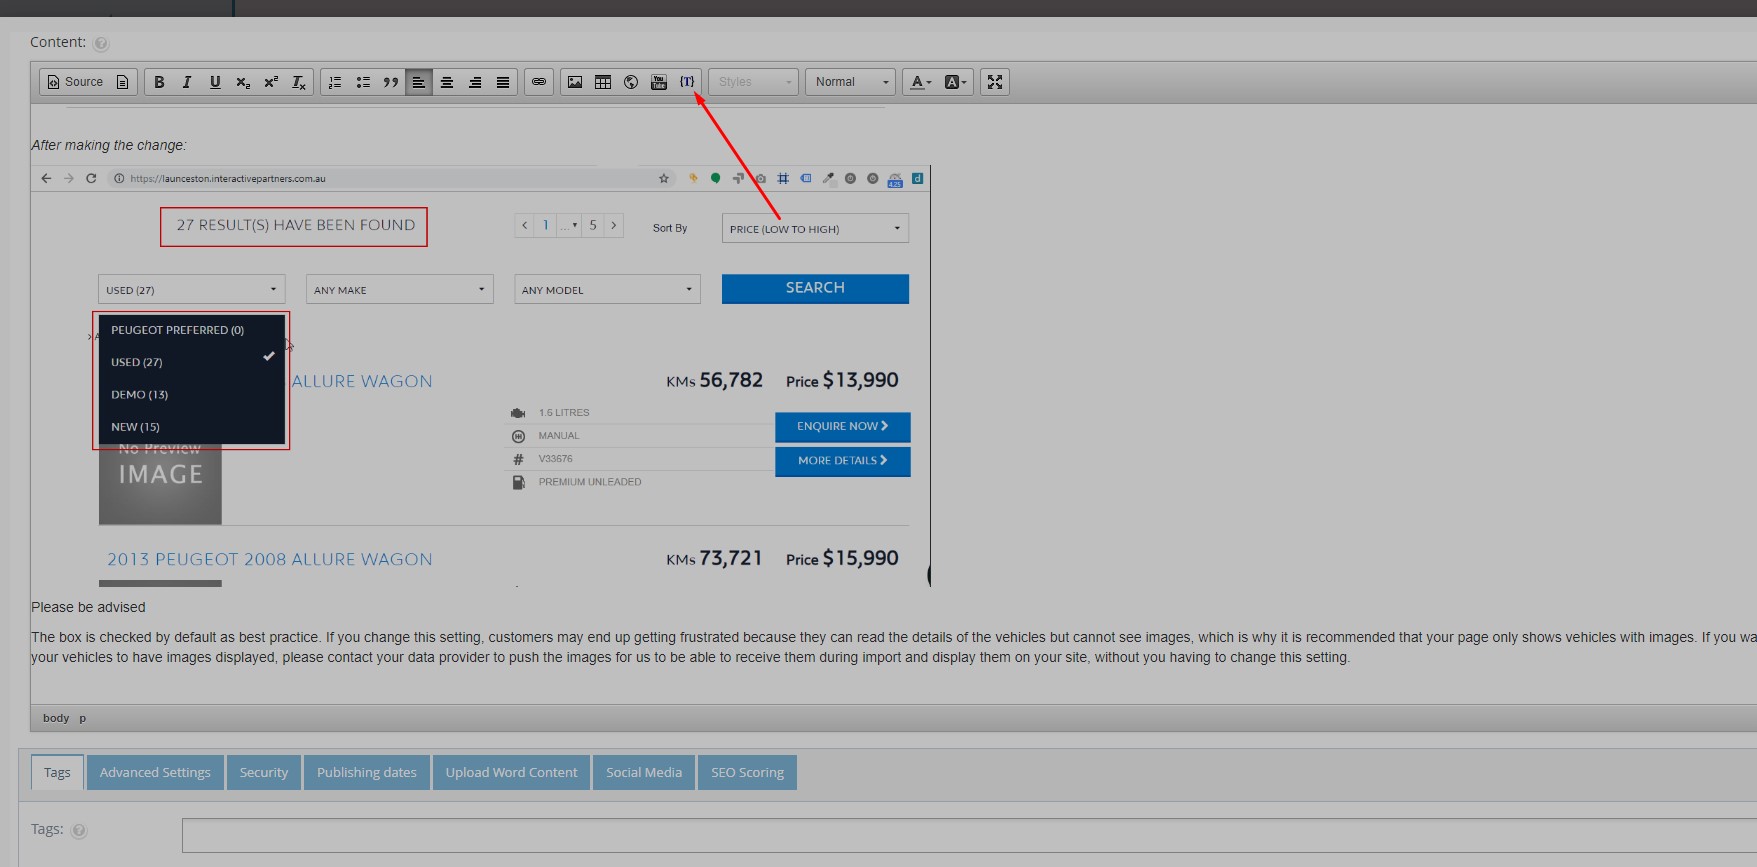
3In the new popup, click the {T} icon to find a Curly Bracket

-
4In the new popup, click the icon to find a Curly Bracket
-
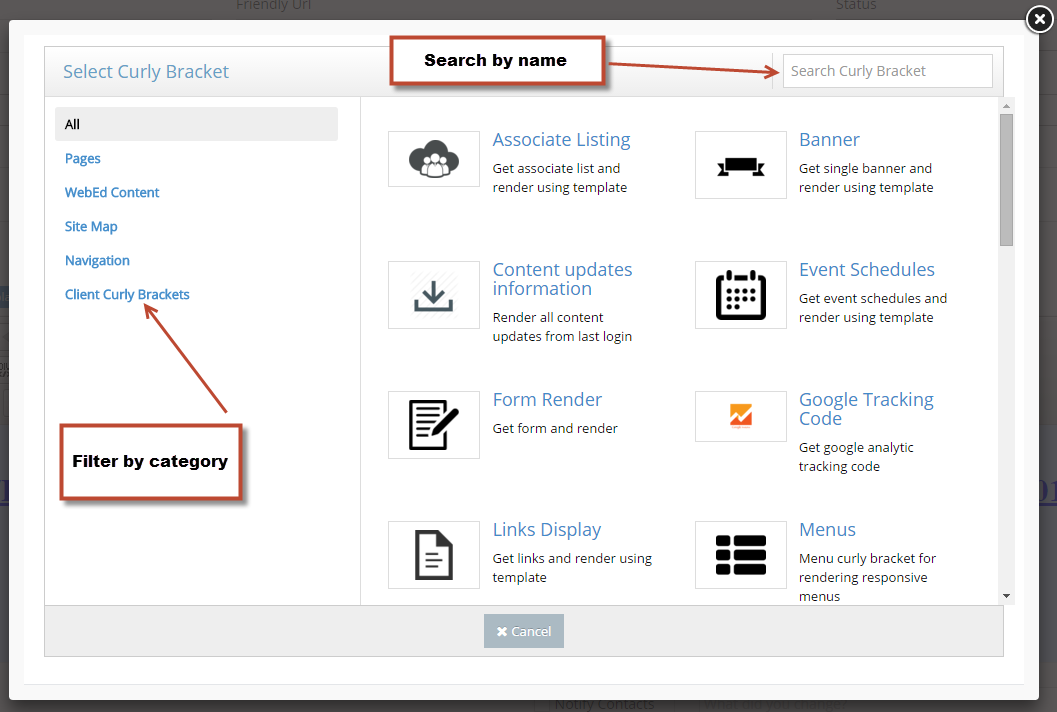
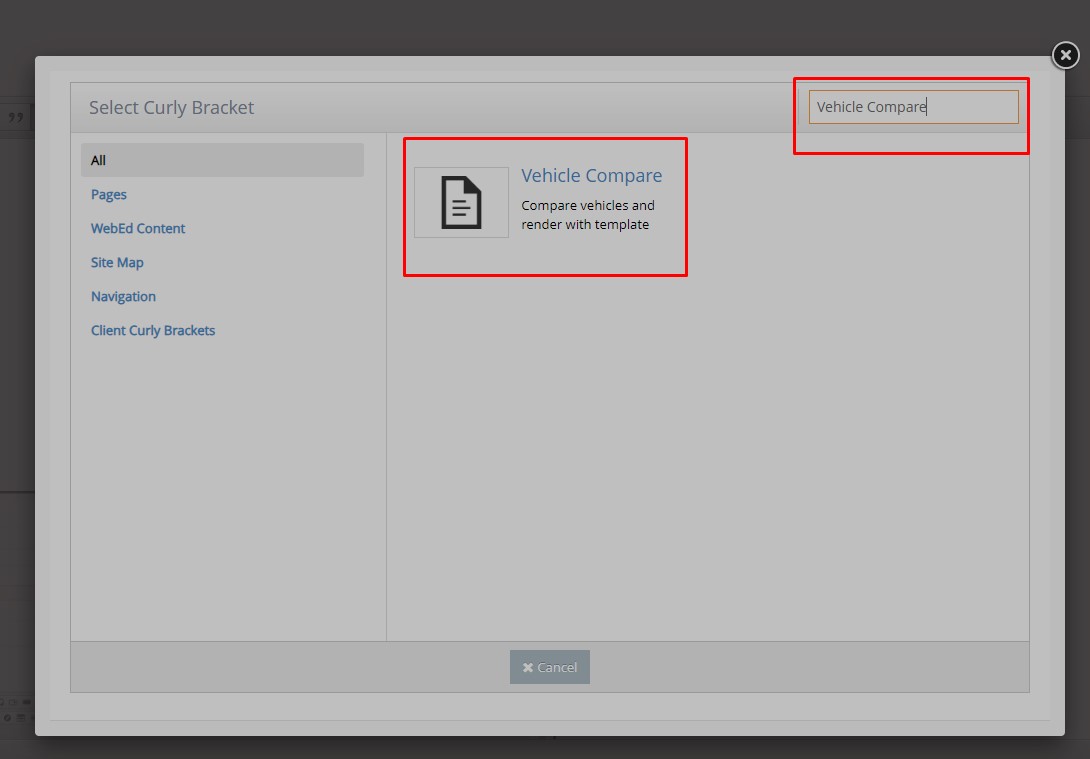
5List Curly Brackets: Search for the "Vehicle Compare" on the categories listed and on the left column or enter "Vehicle Compare" in the textbox in the top right.
-
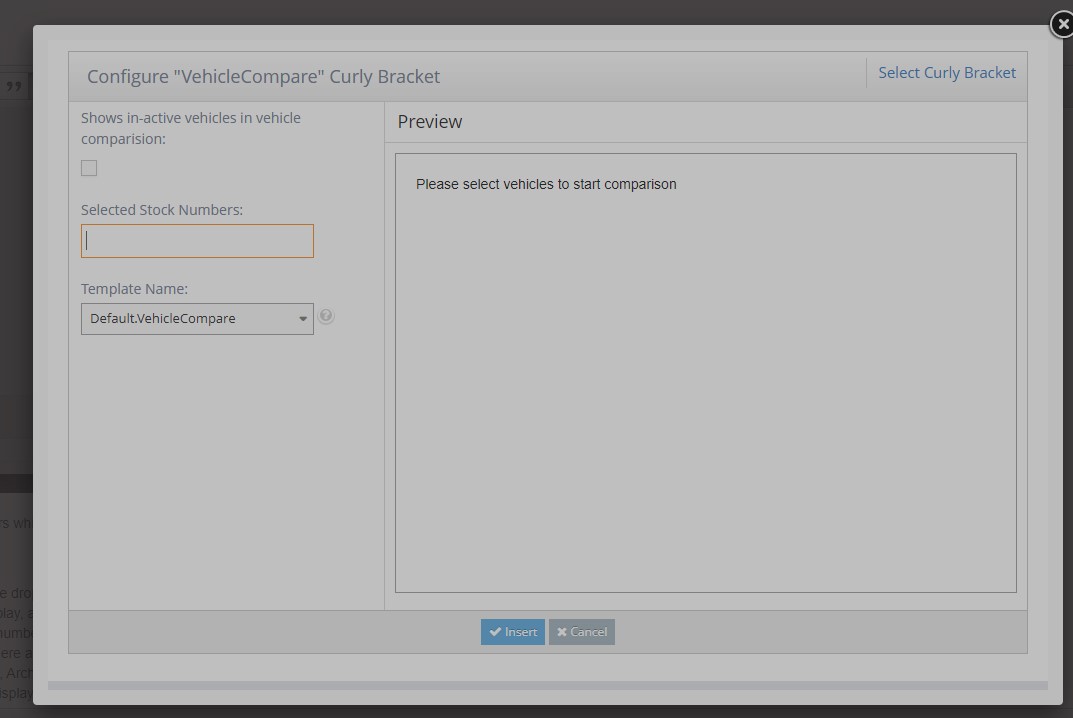
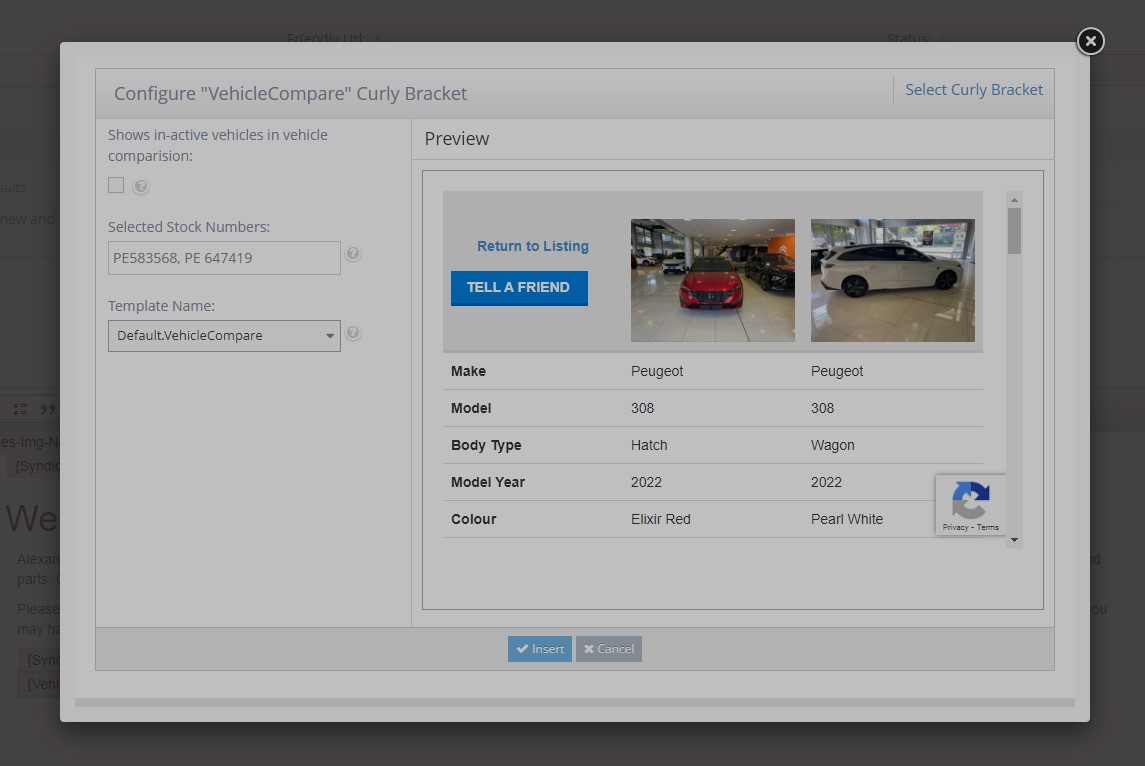
6For the Vehicle Compare Curly Bracket it has these items you can configure:
- Shows in-active vehicles in vehicle comparison checkbox - gives you the option to enable inactive stock/listing to be listed and to be available on the vehicles to be compared with
- Selected Stock Numbers - allows you to input the Stock Numbers of the vehicles to be compared. (Separated by commas ",")
- Template Name - allows you to choose the template of the Vehicle Compare module, if there are no custom templates there is always a default to be pre-selected.
If you want a custom one you can make a request by contacting the IP support team to help you to do so.
-
7
Click the Insert button to complete configure step.
-
8Click OK in a small popup to complete.
-
9
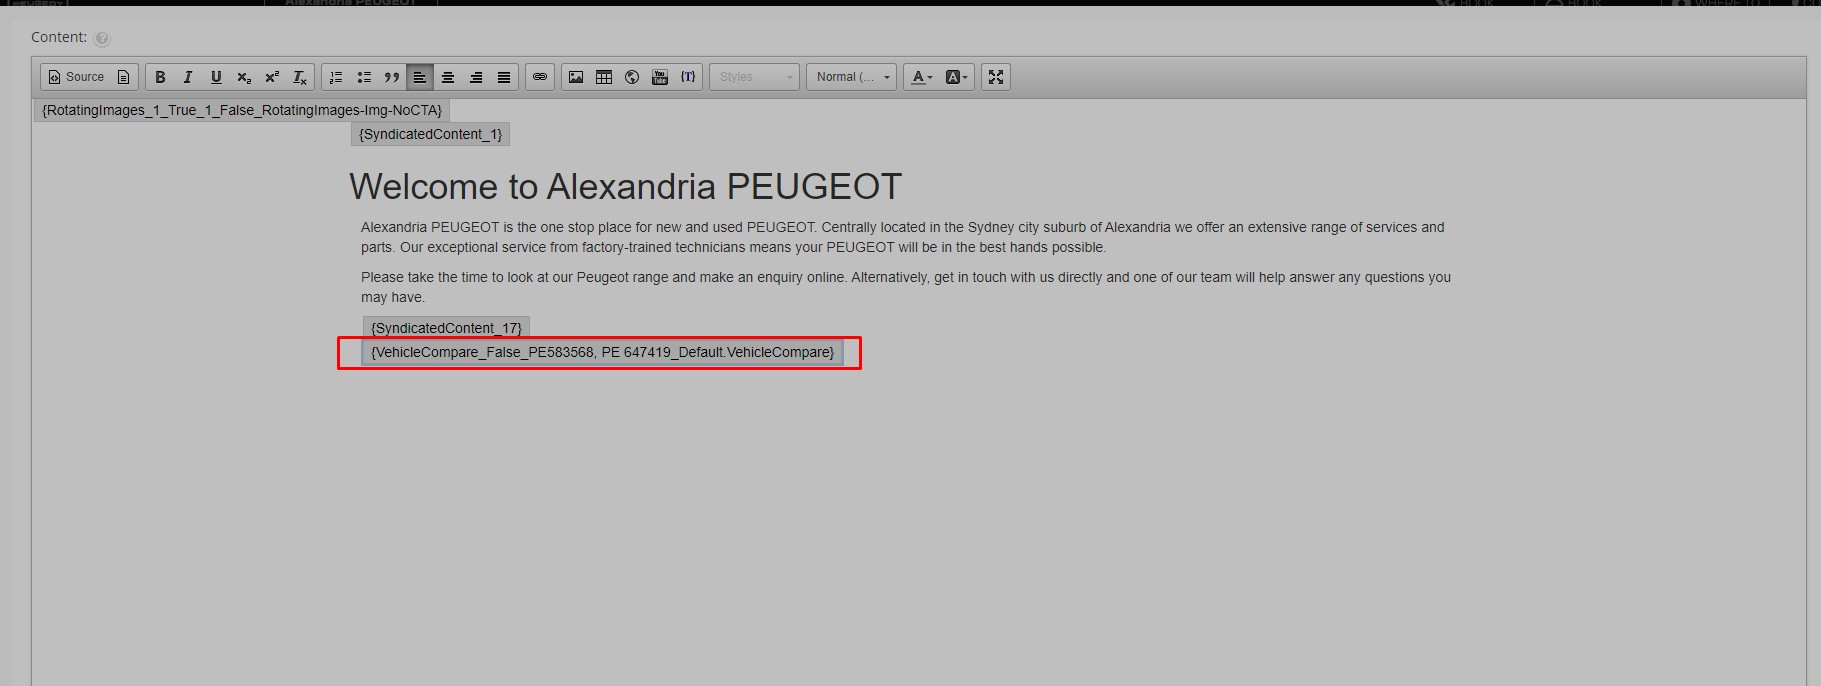
The Curly Bracket will display a preview of the content of a page.
-
10Click Update and Close to view the result.