This guide will walk you through the basic steps on how to create a form, from navigating to the Forms module, dragging components, and setting up fields.
STEP-BY-STEP
-
1Log in as an administrator and go to the Admin Dashboard.
Learn how to log in here → -
2Under Modules on the left menu, choose Forms
-
3Click Web Forms (We have different types of forms, such as Web Forms, Event Forms, Competition Forms, and Membership Forms). For this guide, we will be using the Web Forms.
-
4Upon clicking the Web Forms, you will be redirected to the Forms Management page.

-
5In the upper-right section, you can see the Create New Form. Click the button.
-
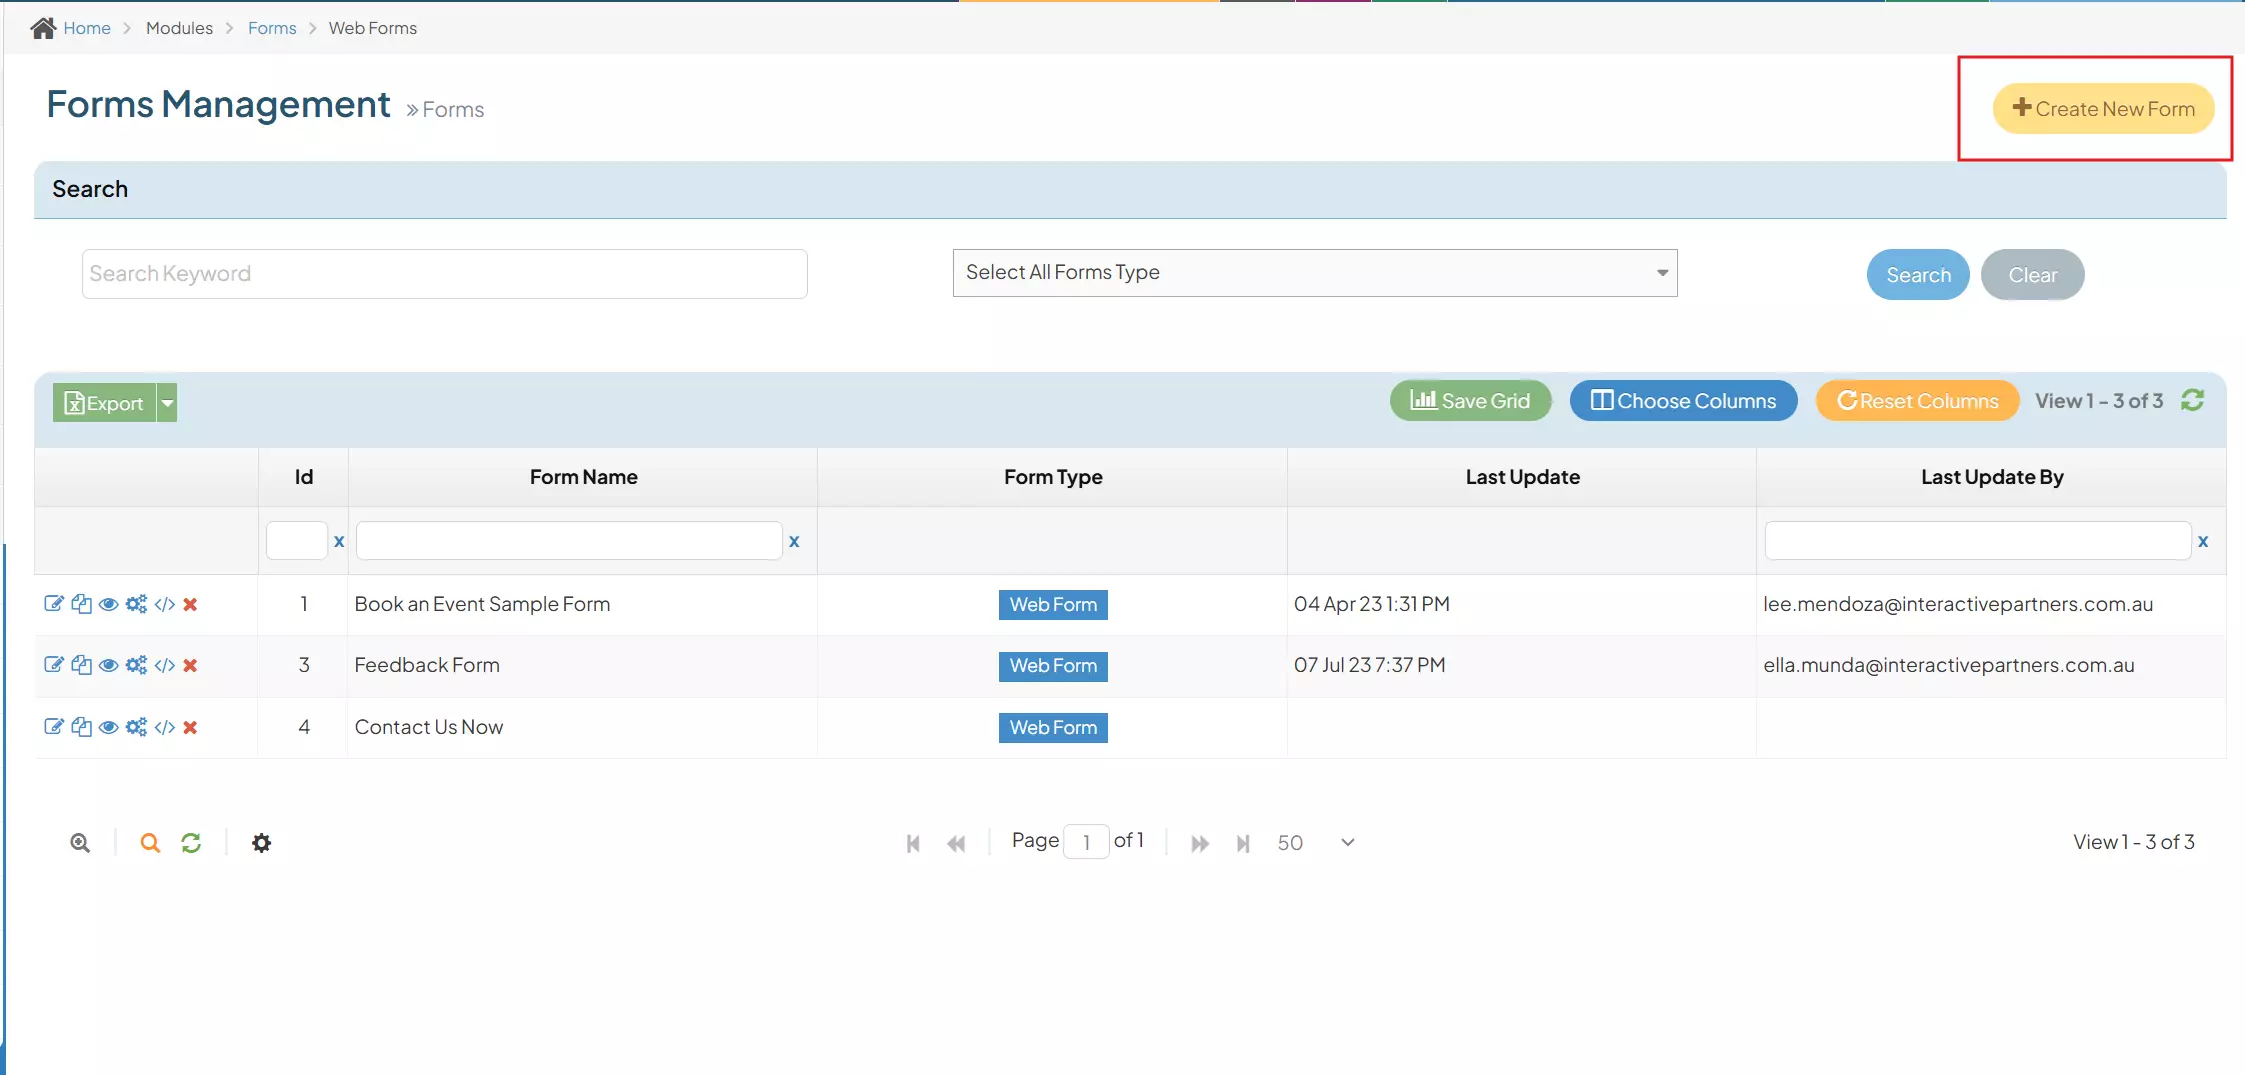
6By clicking the button, you will be redirected to the Form Builder page.
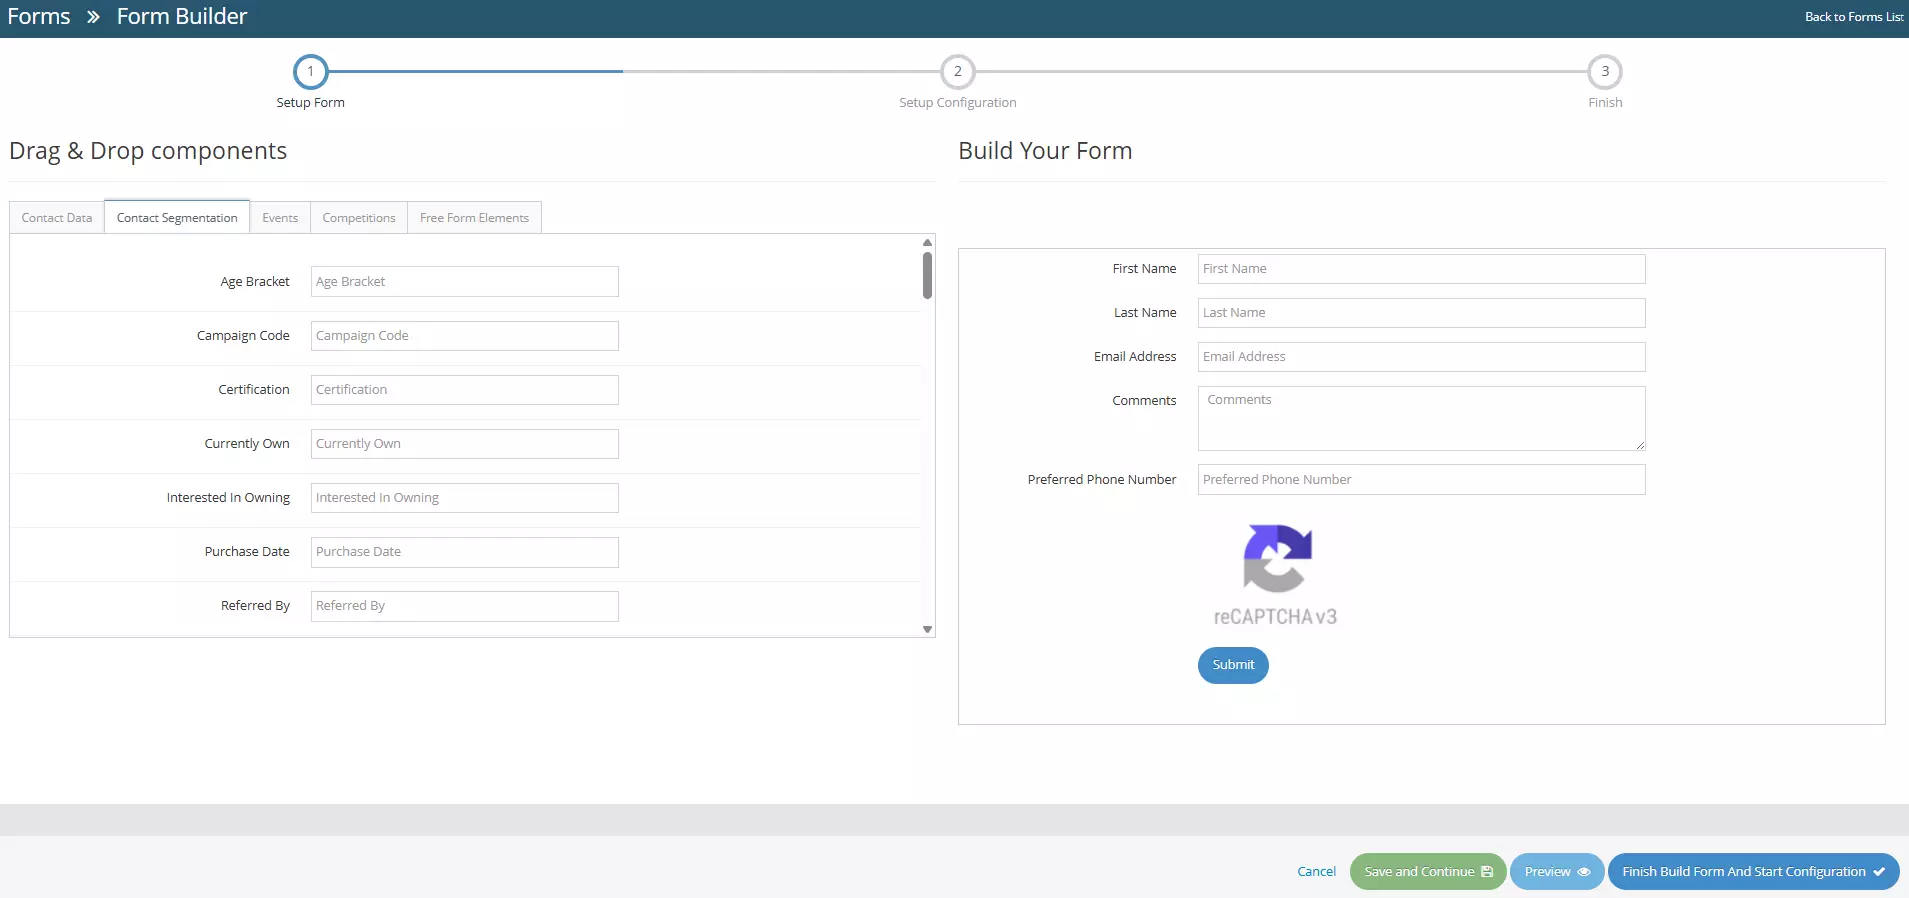 On the left side, you can see the Drag and Drop Components, as the name suggests, these components can be dragged across the right section to build your form (Build Your Form).
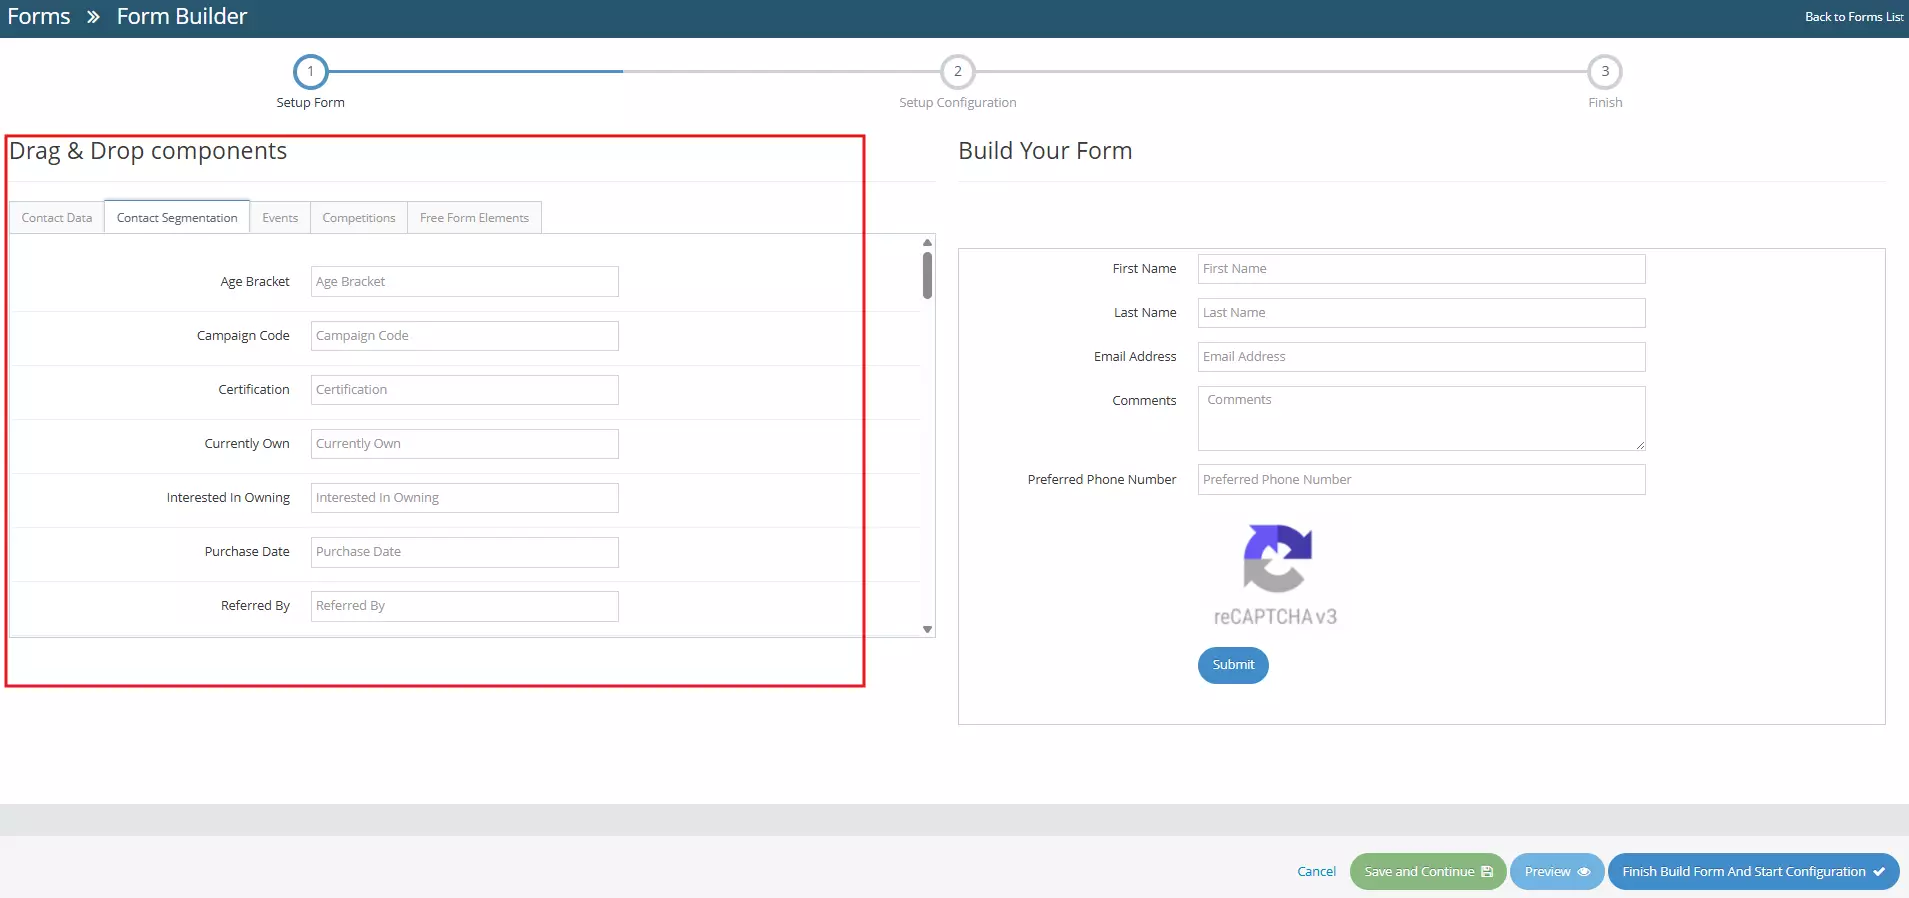 On the right side, you can see the Build Your Form section, this section contains default fields upon creation.Default fields:
- First Name
- Last Name
- Email Address
- Comments
- Preferred Phone number
- Recaptcha
- Submit button
-
7Now, to add new fields or components, simply select by clicking and holding a component in the Drag and Drop Components section and dragging the component across the Build Your Form section
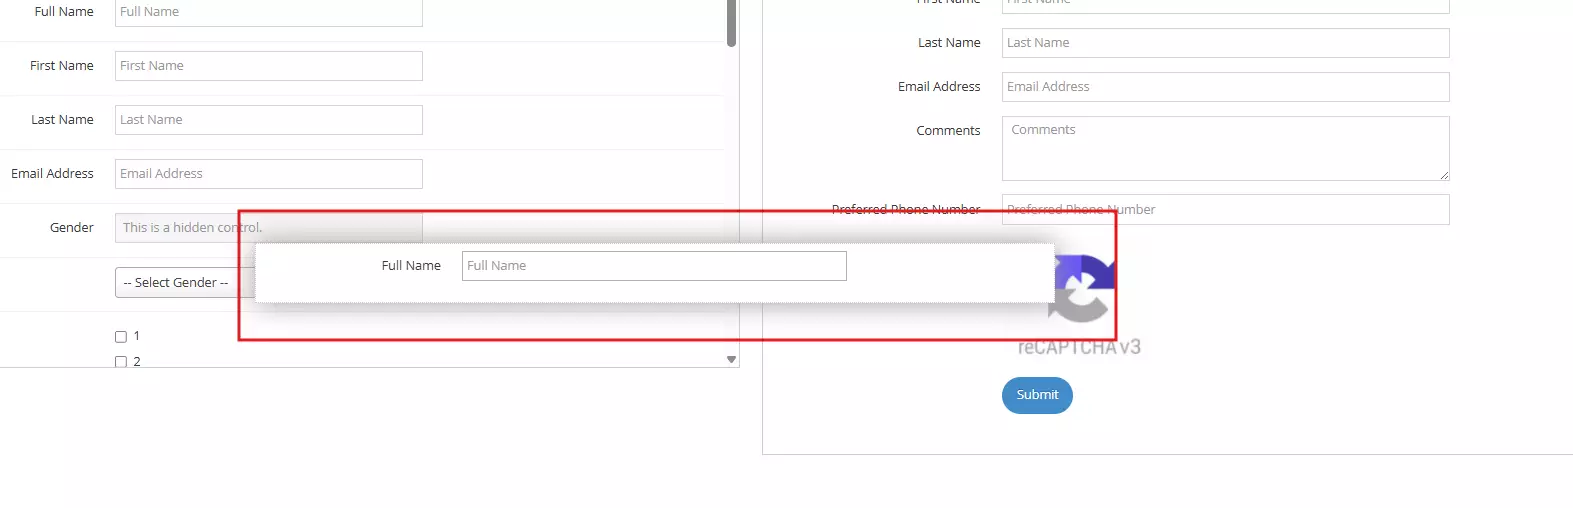
-
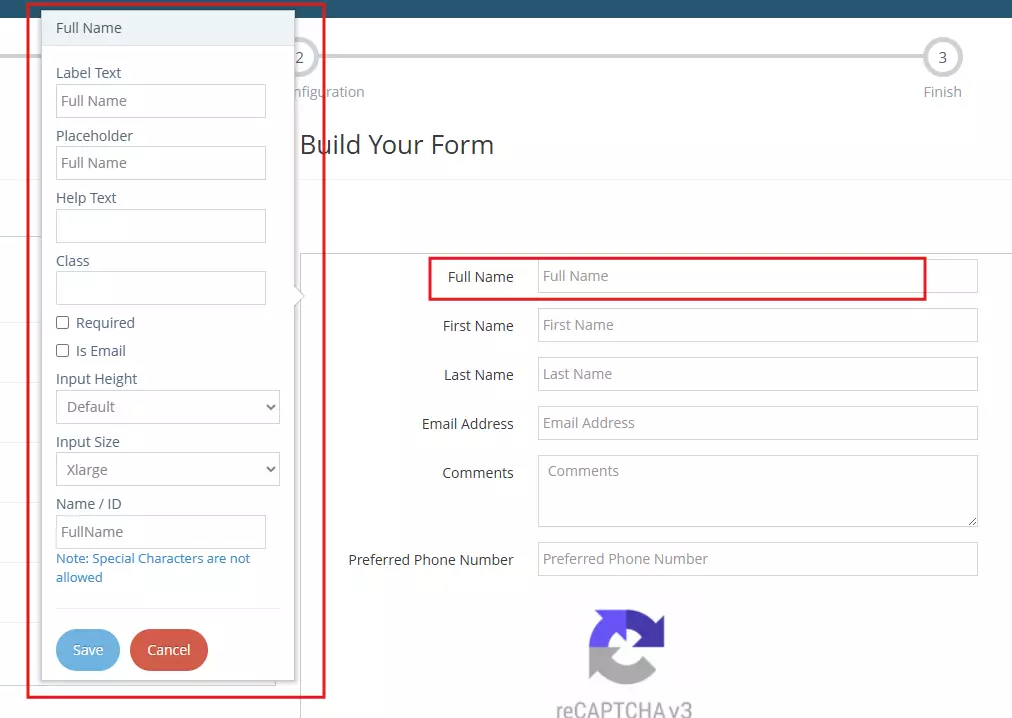
8Once done dragging the field, click on the field. This will open a popover that shows the field's Properties.You can edit the properties of that field, such as:
- Label Text
- Placeholder
- Help Text
- Class
- Required
- IsEmail
- Input Height
- Input Size
- Important: Name/ID - this property must be unique.
-
9Once you're satisfied with the form you've created, you can Save and Continue, Preview or Finish Build Form and Start Configuration. The buttons are located in the lower-right section
- Cancel - cancel changes, user will be redirected to the Forms Management page.
- Save and Continue - saves the changes made, user will stay in the Form Builder page.
- Preview - redirects to the Form Preview page.
- Finish Build Form and Start Configuration - User will be redirected to the form configuration page. Learn how to configure your form here →
