Inserting Protected Documents
STEP-BY-STEP
-
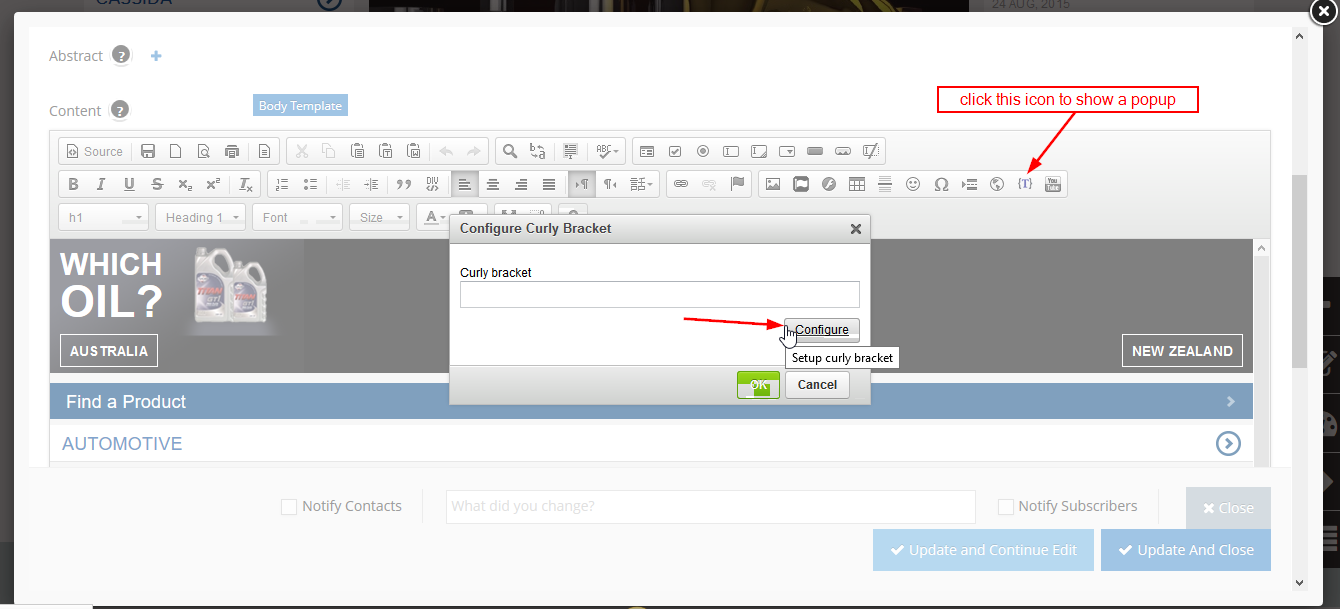
1Log in as an administrator and go to the page you want to insert your Protected Documents, and click the Edit icon on the right
Learn how to log in here → -
2Click configure button to insert the curly bracket.
-
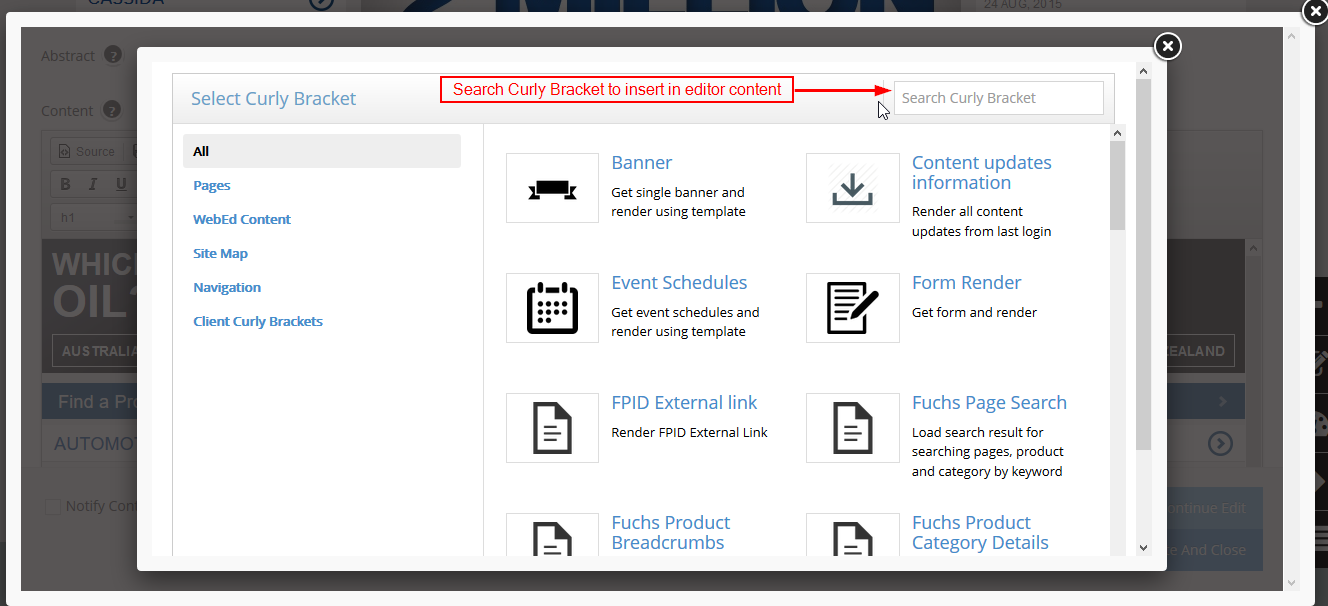
3Search for Protected Documents
-
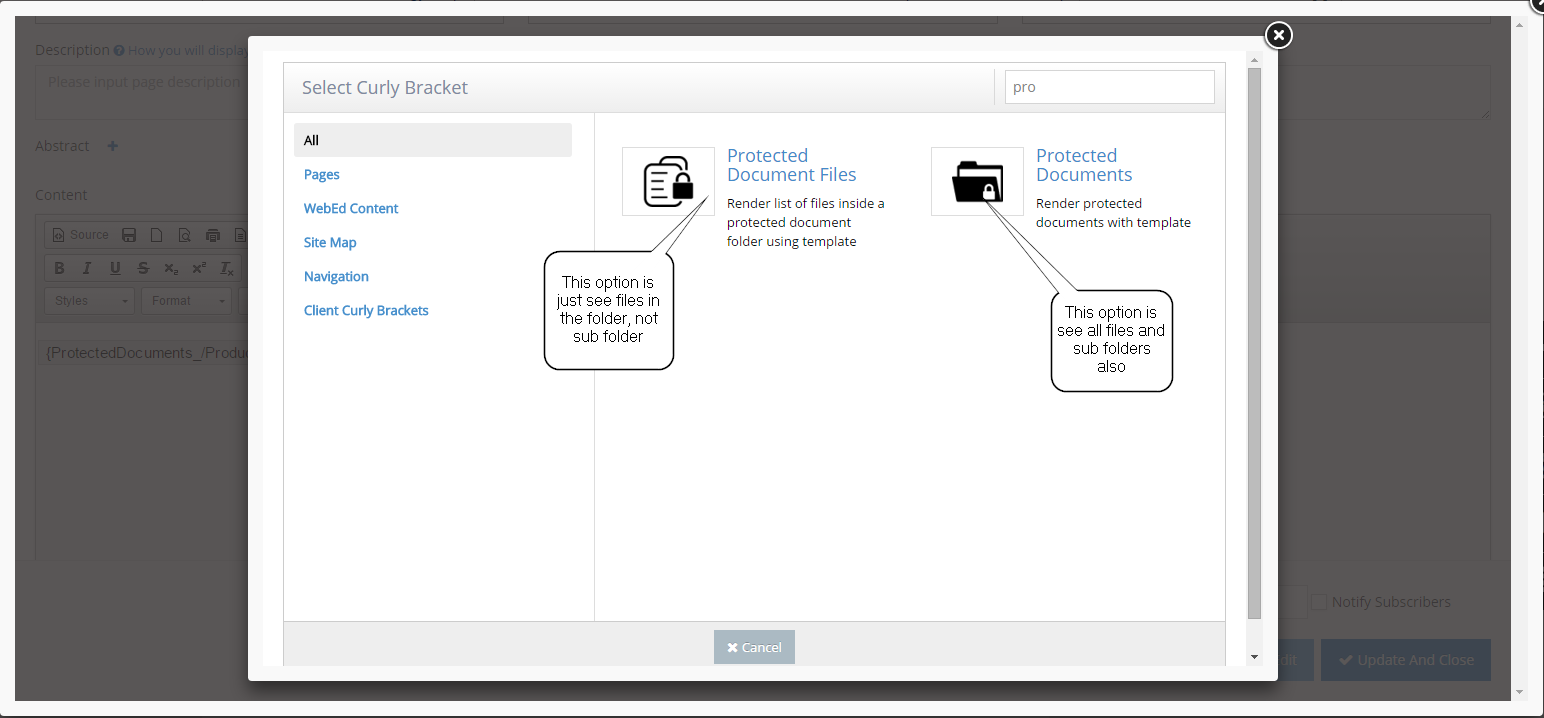
4You have 2 options to select the detail to show the visitor
- Protected Document Files: just see files in the folder, sub folders will disappear.
- Protected Documents: see all files and subfolders.
-
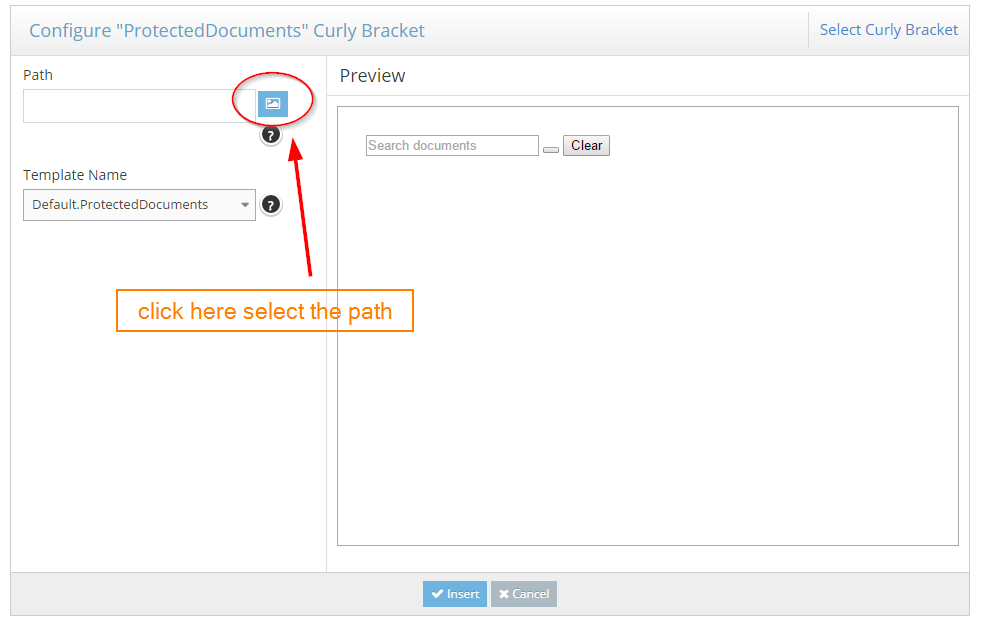
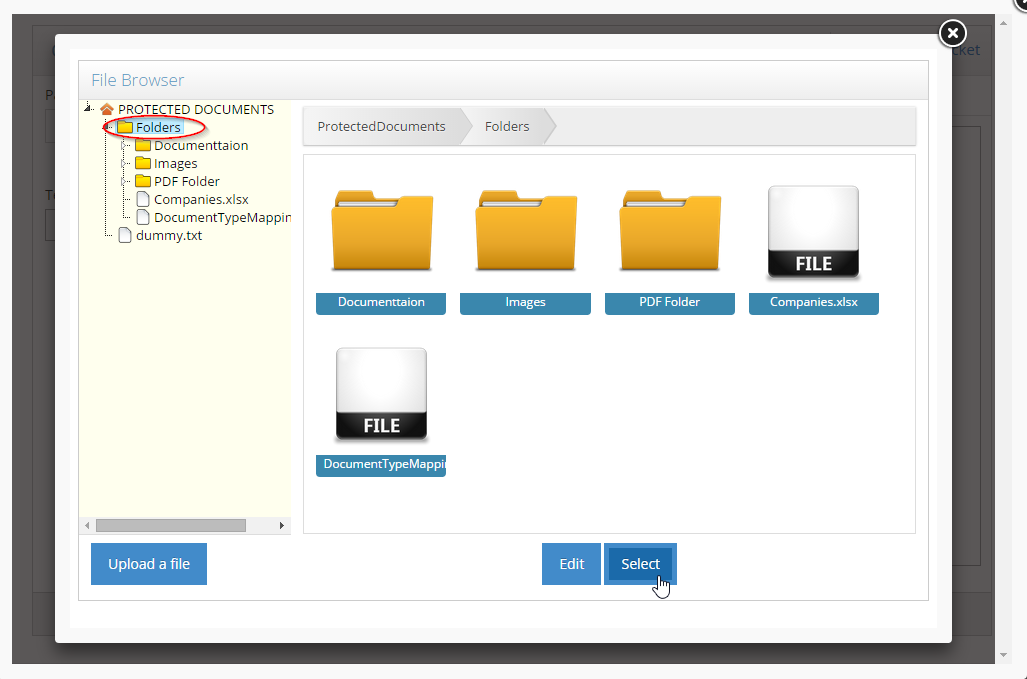
5Click on the folder to open the File Manager, and select the path which contains the documents to display
-
6Navigate through the folders and choose the correct path, then click select
-
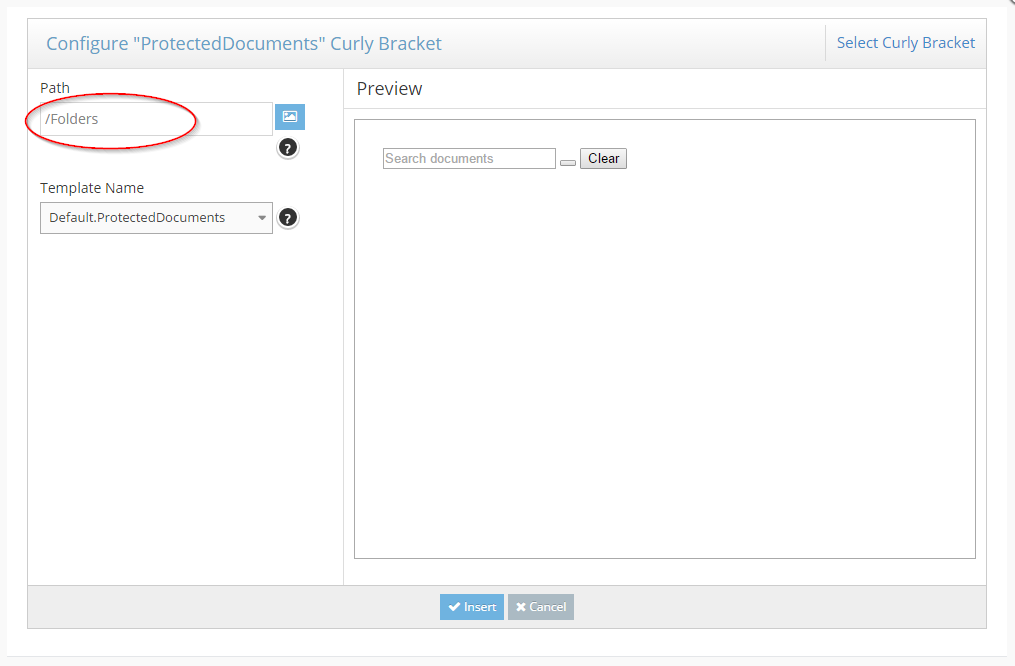
7The folder path will be defined and added into the 'Path' field, click Insert at the bottom to finish inserting the Protected Documents curly bracket
-
8The Protected Documents curly bracket is now inserted into the page content
